신장과 체중을 입력하고 확인을 누르면 나의 BMI를 계산해서 BMI 결과값을 보여주는 간단한 앱을 만들어 볼것이다
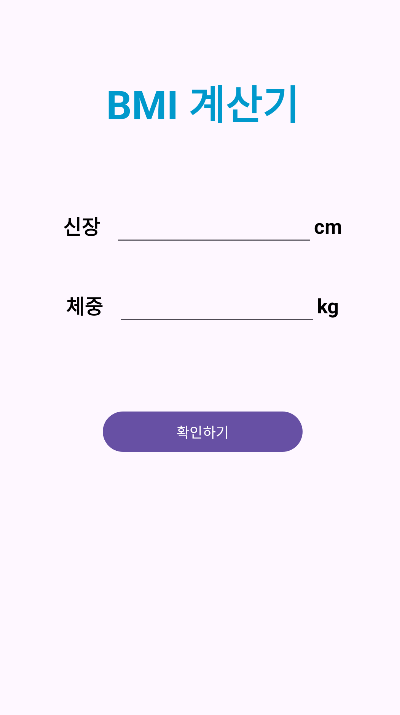
먼저 신장과 체중을 입력해주는 메인화면을 디자인해준다
이제 MainActivity에서 확인하기 버튼을 클릭했을때 신장을 입력한값과 체중을 입력한 값을 PutExtra를 사용해서 ResultActivity로 넘겨준다. 만약에 신장값과 체중값을 넣지 않았을땐 토스트메시지가 뜨면서 페이지가 넘어가지 않도록 예외처리를 해준다
class MainActivity : AppCompatActivity() {
    override fun onCreate(savedInstanceState: Bundle?) {
        super.onCreate(savedInstanceState)
        setContentView(R.layout.activity_main)


        val heightEditText = findViewById<EditText>(R.id.et_height)
        val weightEditText = findViewById<EditText>(R.id.et_weight)
        val submitButton = findViewById<Button>(R.id.btn_submit)


        // submitButton 클릭 했을때
        submitButton.setOnClickListener {

            // 예외처리(아무것도 넣지 않았을떄 안넘어가도록)
            if(heightEditText.text.isEmpty()){
                Toast.makeText(this, "신장을 입력해주세요", Toast.LENGTH_SHORT).show()
                return@setOnClickListener
            }

            if(weightEditText.text.isEmpty()){
                Toast.makeText(this, "체중을 입력해주세요", Toast.LENGTH_SHORT).show()
                return@setOnClickListener
            }


            // 사용자가 입력한 신장,체중 텍스트 받아오기
            val height : Int = heightEditText.text.toString().toInt()
            val weight : Int = weightEditText.text.toString().toInt()

            // 받아온 값 넘겨주기
            val intent = Intent(this, ResultActivity::class.java)
            intent.putExtra("height",height)
            intent.putExtra("weight",weight)
            startActivity(intent)


        }


    }
}
MainActivity.kt
이제 결과화면을 디자인해준다

ResultActivity로 가서 MainActivity에서 보낸 코드를 받아와준다
그리고 value라는 변수에 BMI계산하는 값을 넣어주고, 소숫점 첫째자리까지만 보이게 round함수를 사용하여 설정해준다
그런다음 텍스트와 텍스트 컬러,해당하는 이미지를 바꿔줄것이기 떄문에 해당하는 변수를 각각 resultText, resColor, resImage라고 변수를 설정하여 초기화해준다
이제 이 변수들을 이용해서 BMI치수가 몇일때 저체중,정상체중,, 텍스트가 나올지 정해주고, 그에 따라 이미지랑 색깔도 바꿔준다
마지막으로 이 값들을 해당하는 텍스트,이미지에 적용시켜주면 끝이다
class ResultActivity : AppCompatActivity() {
    override fun onCreate(savedInstanceState: Bundle?) {
        super.onCreate(savedInstanceState)
        setContentView(R.layout.activity_result)


        // MainActivity에서 보낸코드 받아주기
        val height = intent.getIntExtra("height", 0)
        val weight = intent.getIntExtra("weight", 0)

        // BMI 계산 (체중을 신장의 제곱으로 나눔)
        // height는 cm이니깐 100을 곱해서 m로 만든뒤, pow를 사용해서 제곱해주고, 이를 체중으로 나눠줌
        var value = weight / (height / 100.0).pow(2.0)
        // 소숫점 첫째자리까지만
        value = round(value*10)/10


        var resultText = ""     // 텍스트 바꾸는 변수
        var resImage = 0       // 이미지 바꾸는 변수
        var resColor = 0       // 텍스트 컬러 바꾸는 변수


        if (value < 18.5){
            resultText = "저체중"
            resImage = R.drawable.img_lv1
            resColor = Color.YELLOW
        }else if(value >= 18.5 && value < 23.0){
            resultText = "정상 체중"
            resImage = R.drawable.img_lv2
            resColor = Color.GREEN
        }else if(value >= 23.0 && value < 25.0) {
            resultText = "과체중"
            resImage = R.drawable.img_lv3
            resColor = Color.BLUE
        }else if(value >= 25.5 && value < 30.0) {
            resultText = "경도 비만"
            resImage = R.drawable.img_lv4
            resColor = Color.CYAN
        }else if(value >= 30.0 && value < 35.0) {
            resultText = "중정도 비만"
            resImage = R.drawable.img_lv5
            resColor = Color.MAGENTA
        }else{
            resultText = "고도 비만"
            resImage = R.drawable.img_lv6
            resColor = Color.RED
        }


        val tv_resValue = findViewById<TextView>(R.id.tv_resValue)
        val tv_resText = findViewById<TextView>(R.id.tv_resText)
        val tv_image = findViewById<ImageView>(R.id.iv_resImage)
        val btn = findViewById<Button>(R.id.btn_close)


        // tv_resValue에 value값 넣어주기
        tv_resValue.text = value.toString()
        tv_resText.text = resultText
        tv_image.setImageResource(resImage)
        tv_resText.setTextColor(resColor)


        btn.setOnClickListener {
            finish()
        }


    }
}
ResultActivity.kt
이렇게 결과화면이 잘 보여지는것을 확인할수있다
'Android Project' 카테고리의 다른 글
| [Android / Kotlin] SNS앱 팀 프로젝트 - 메인페이지 (0) | 2024.04.06 |
|---|---|
| [kotlin]간단한 로또번호 생성앱 만들기 (0) | 2024.02.26 |
| [Android/Kotlin] 커뮤니티앱(13) - 게시판 댓글 (0) | 2024.02.08 |
| 예제 앱 만들기(4) - 게시글 리스트뷰에 표시 (0) | 2024.01.30 |
| 예제 앱 만들기(3) - 게시글 등록 (0) | 2024.01.30 |


