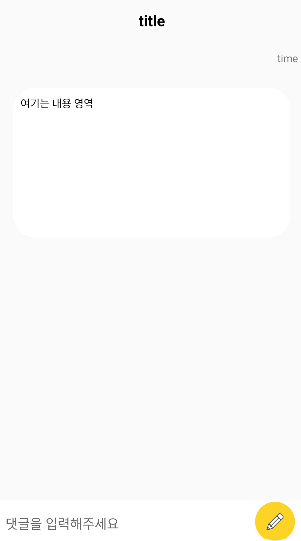
댓글을 입력했을때 나오는 영역을 만들어주기 위해서 게시물눌렀을때 나오는 레이아웃에 ListView를 추가해준다
그리고 게시물 이미지가 업로드 되지 않은경우에는 이미지뷰를 보이지 않도록 숨겨주는 코드를 getImageData함수 내에 작성해준다
// 이미지를 업로드하지 않았을때는 getImageArea를 보이지않도록
binding.getImageArea.isVisible = false
BoardInsideActivity.kt
그 다음에 댓글입력 레이아웃을 디자인해준다
BoardInsideActivity에 아래와같이 추가해준다
<LinearLayout
    android:layout_width="match_parent"
    android:layout_height="60dp"
    android:layout_alignParentBottom="true"
    android:background="@color/white">

    <EditText
        android:id="@+id/commentArea"
        android:hint="댓글을 입력해주세요"
        android:layout_marginLeft="10dp"
        android:layout_width="320dp"
        android:layout_height="match_parent"
        android:background="@android:color/transparent"/>

    <ImageView
        android:id="@+id/commentBtn"
        android:src="@drawable/btnwrite"
        android:layout_width="wrap_content"
        android:layout_height="wrap_content"/>

</LinearLayout>
BoardInsideActivity.kt
이제 입력한 댓글을 파이어베이스 데이터베이스에 저장해주는 작업을 해볼것이다
게시물들 각각에 대한 댓글들을 입력할수있어야되니깐 파이어베이스 구조를 아래와 같이 해줄것이다
<데이터구조>
comment
- Boardkey
- Commentkey(임의의값)
- CommentData
- CommentData
- CommentData
먼저 파이어베이스에 comment를 만들기위해서 아래와같은 코드를 추가해준다
// 파이어베이스에 comment 추가
val commentRef = database.getReference("comment")
FBRef.kt
class BoardInsideActivity : AppCompatActivity() {

    private val TAG = BoardInsideActivity::class.java.simpleName

    private lateinit var binding : ActivityBoardInsideBinding

    // key값 선언
    private lateinit var key : String

    override fun onCreate(savedInstanceState: Bundle?) {

        super.onCreate(savedInstanceState)

        binding = DataBindingUtil.setContentView(this,R.layout.activity_board_inside )

          ...


        // 댓글 입력버튼 눌렀을때
        binding.commentBtn.setOnClickListener {
            insertComment(key)
        }

    }


    // 파이어베이스에 입력한 댓글 저장하는 함수
    fun insertComment(key : String){

        FBRef.commentRef    // comment
            .child(key)     // Boardkey
            .push()         // Commentkey
            .setValue(CommentModel(binding.commentArea.text.toString()))

        Toast.makeText(this, "댓글 입력완료", Toast.LENGTH_SHORT).show()
        // 텍스트 지워줌
        binding.commentArea.setText("")


    }
BoardInsideActivity.kt
이런식으로 코드를 작성해준다
setValue에는 데이터모델을 넣어줘야하는데 아직 데이터모델이 없으므로 새로 생성해준다
이렇게 생성해준 모델에 binding.commentArea.text.toString()을 써줘서, 내가 작성한 댓글이 파이어베이스에 등록되도록 해준다. 그리고 댓글을 입력하면 내가 입력한 텍스트가 지워지게 해줘서 편리성을 더해주었다.
package com.example.mysololife.comment

data class CommentModel (

    val commentTitle : String = ""
)
CommentModel.kt
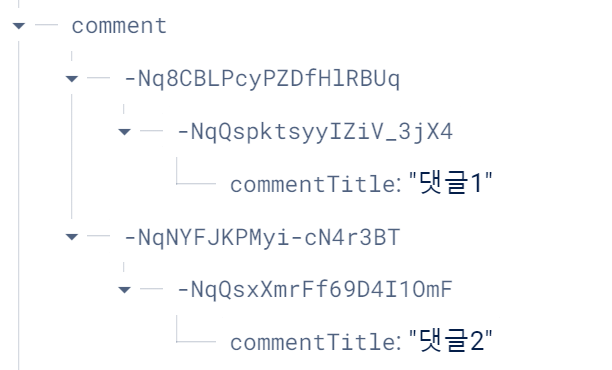
여기까지해주고 앱을 실행시킨후 파이어베이스를 확인해보면 comment안에 Board에해당하는key값이 들어가고 그 밑에 commentkey(임의의값)이 들어가고 그 안에 내가 작성한 댓글이 들어가는것을 확인할수있다
내가 작성한댓글이 파이어베이스에 잘 반영이 되었다
이제 파이어베이스에 반영된 댓글데이터를 리스트뷰 화면에 보여주는 작업을 해볼것이다
먼저 댓글 아이템뷰를 디자인해준다. 댓글과 시간까지 추가해줬다 (시간을 추가해줘서 CommentModel에 가서 시간데이터도 추가해줬다)
<?xml version="1.0" encoding="utf-8"?>
<LinearLayout
    xmlns:android="http://schemas.android.com/apk/res/android"
    android:layout_width="match_parent"
    android:layout_height="match_parent"
    android:orientation="vertical">

    <TextView
        android:id="@+id/titleArea2"
        android:text="댓글"
        android:textSize="20sp"
        android:layout_margin="15dp"
        android:textStyle="bold"
        android:textColor="@color/black"
        android:layout_width="wrap_content"
        android:layout_height="wrap_content"/>

    <TextView
        android:id="@+id/timeArea2"
        android:text="시간"
        android:textSize="10sp"
        android:textColor="#999999"
        android:layout_marginLeft="20dp"
        android:layout_marginTop="5dp"
        android:layout_width="wrap_content"
        android:layout_height="wrap_content"/>

</LinearLayout>
comment_list_item.xml

이제 어뎁터를 만들어줘야한다
아래와 같이 어뎁터를 만들어서, 아이템뷰와 연결을 해준다
class CommentLVAdapter(val commentList : MutableList<CommentModel>) : BaseAdapter(){
    override fun getCount(): Int {
        return commentList.size
    }

    override fun getItem(position: Int): Any {
        return commentList[position]
    }

    override fun getItemId(position: Int): Long {
        return position.toLong()
    }

    override fun getView(position: Int, convertView: View?, parent: ViewGroup?): View {

        // 아이템뷰를 가져와서 연결
        var view = convertView

        if(view == null){
            view = LayoutInflater.from(parent?.context).inflate(R.layout.comment_list_item, parent,false)
        }


        // 내가 작성한 댓글값이 commentArea1에 적용되게
        val title = view?.findViewById<TextView>(R.id.commentArea2)
        title!!.text = commentList[position].commentTitle


        // 내가 작성한 time값이 timeArea1에 적용되게
        val time = view?.findViewById<TextView>(R.id.timeArea2)
        time!!.text = commentList[position].commentCreatedTime


        return view!!

    }


}
CommentLVAdapter.kt
이제 이 어뎁터랑 연결을 해주는 작업을 해볼것이다
CommentData를 받아오는 getCommentData함수를 작성해주고, 방금 만든 어뎁터와 리스트뷰를 연결해준다
class BoardInsideActivity : AppCompatActivity() {

    private val TAG = BoardInsideActivity::class.java.simpleName

    private lateinit var binding : ActivityBoardInsideBinding

    // key값 선언
    private lateinit var key : String

    private val commentDataList = mutableListOf<CommentModel>()

    private lateinit var commentAdapter : CommentLVAdapter

    override fun onCreate(savedInstanceState: Bundle?) {

        super.onCreate(savedInstanceState)

        binding = DataBindingUtil.setContentView(this,R.layout.activity_board_inside )


        ...


        // 어뎁터와 ListView 연결
        commentAdapter= CommentLVAdapter(commentDataList)
        binding.commentLV.adapter = commentAdapter


        getCommentData(key)

    }


    // CommentData 받아오는(가져오는) 함수
    fun getCommentData(key : String){

        // 데이터 가져오기
        val postListener = object : ValueEventListener {
            override fun onDataChange(dataSnapshot: DataSnapshot) {

                // 겹쳐서 출력되는 현상 방지 (데이터 초기화)
                commentDataList.clear()

                for (dataModel in dataSnapshot.children){

                    // 데이터 받아오기
                    val item = dataModel.getValue(CommentModel::class.java)
                    commentDataList.add(item!!)   // commentDataList에 데이터 하나씩 넣어줌

                }

                commentAdapter.notifyDataSetChanged()

            }

            override fun onCancelled(databaseError: DatabaseError) {
                // Getting Post failed, log a message
                Log.w(TAG, "loadPost:onCancelled", databaseError.toException())
            }
        }
        FBRef.commentRef.child(key).addValueEventListener(postListener)

    }


    ...

}
BoardInsideActivity.kt
이렇게하면 내가 적은 댓글이 잘 보이고 작동되는것을 확인할수있다
'Android Project' 카테고리의 다른 글
| [kotlin]간단한 로또번호 생성앱 만들기 (0) | 2024.02.26 |
|---|---|
| [kotlin] 간단한 BMI 계산기앱 만들기 (0) | 2024.02.26 |
| 예제 앱 만들기(4) - 게시글 리스트뷰에 표시 (0) | 2024.01.30 |
| 예제 앱 만들기(3) - 게시글 등록 (0) | 2024.01.30 |
| 예제 앱 만들기(2) - 데이터바인딩, 로그인, 로그아웃 (0) | 2024.01.30 |


